
The journal
How can I safely clean smelly seat belts? Practical steps and safety first
how to clean car seat belts safely, remove odors without harming webbing, and verify retractors after cleaning.
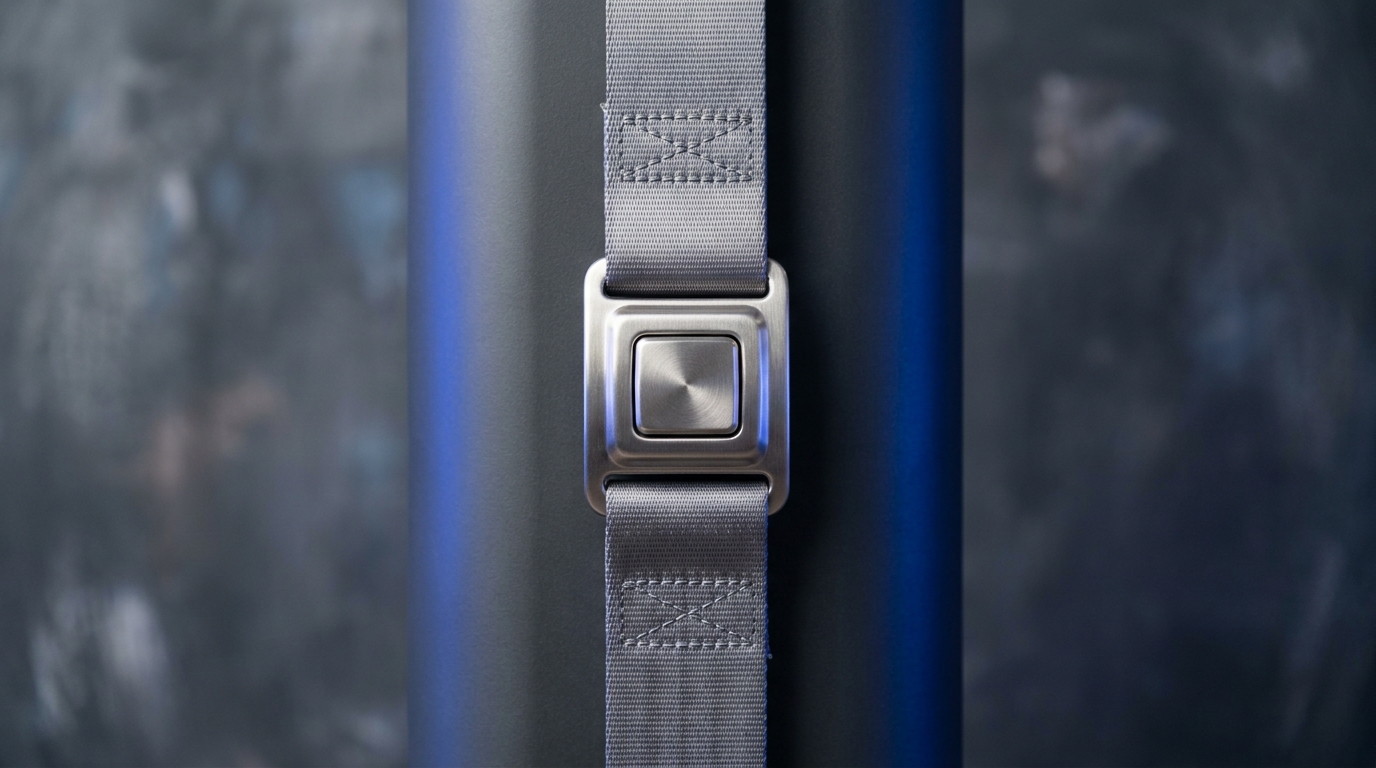
Quick answer and safety first: can you clean smelly seat belts?
Yes. In most cases you can clean seat belt webbing carefully without removing the retractor, but you must avoid soaking mechanisms or using harsh chemicals. Start by assessing whether the smell comes from the webbing itself or from nearby upholstery or the retractor area, and proceed with mild cleaners and small amounts of water.
Before you begin, remember the safety priorities: do not submerge the retractor or spray water deep into housings, avoid aggressive scrubbing that can weaken fibers, and check the vehicle manufacturer manual for any model-specific warnings.
How can I remove odors from seat belts without damaging the webbing or retractor?
Use a mild detergent and warm water applied sparingly to the extended webbing, blot rather than saturate, let the belt air-dry mostly before retracting, and run functional checks; stop and seek professional inspection if the belt is frayed or the retractor behaves oddly.
If the belt is frayed, has visible damage to stitching, or the retractor is contaminated with liquids or sticky residues, stop and consult a professional. A service center or an authorized dealer can inspect pretensioners, sensors and mechanical parts if the belt shows mechanical issues.
Short summary: for most fabric webbing, a gentle spot-clean with a mild detergent and careful drying will remove common odors while keeping the mechanism safe, provided you limit moisture near the retractor and follow simple performance checks after cleaning.
Short summary
Cleaning seat belt webbing is often effective for body oil, sweat and food smells if done gently. The focus is on keeping the webbing surface clean without letting water reach the retractor, and on testing belt function afterward.
When to seek professional help
Seek professional help if the belt is torn, the webbing is abraded, the retractor does not move freely, or if you suspect contamination of sensors or pretensioners. If in doubt, stop and have the system inspected to avoid compromising safety.
What causes seat belt odor and how to assess the problem
Seat belt odor most often comes from organic residues on the webbing. Typical sources include body oils, sweat, food spills, smoke and trapped moisture in nearby upholstery. These residues sit in the weave and can produce persistent smells if not addressed.
To decide whether a surface clean will help, inspect the belt carefully: extend the webbing fully and look for visible stains, discoloration or embedded grime along the length you can access. Work in good light and with a clean surface beneath the belt so you can spot fresh residue.
Quick inspection tools and where to use them during a seat belt check
How to check the retractor and buckle: pull the belt out smoothly to full extension, then let it retract slowly; listen for grinding or rubbing sounds and watch for hesitation. Test the buckle by fastening and unfastening it a few times to confirm reliable engagement.
Signs the odor originates elsewhere include a strong smell near the seat base, under cushions, or in the seat frame. If the smell seems strongest where the belt enters the retractor housing or from under the seat, the problem may be inside the mechanism or in adjacent upholstery rather than in the visible webbing.

Common odor sources
Body oils and sweat are common culprits because they transfer directly to the webbing and can soak into the fibers. Food or beverage spills sometimes leave sugary or greasy residues that attract bacteria. Smoke can cling to fabric and make odors linger even after a surface clean, while trapped moisture encourages mildew near the belt anchor or under seats.
How to inspect the belt and retractor
Inspect by hand and sight: run fingers along the webbing and check for roughness, raised fibers or areas that feel stiffer. Look closely at stitching and edges for fraying. If the webbing shows wear or fiber breakage, do not attempt aggressive cleaning; obtain professional advice. Confirm the retractor locks properly by pulling quickly on the belt to trigger the locking mechanism, then release and check smooth retraction.
Step-by-step safe cleaning method for fabric seat belts
Gather materials first: soft brush or toothbrush, microfiber towels, a spray bottle with warm water, mild detergent or gentle upholstery cleaner, gloves, and a bowl for mixing small amounts of solution. Avoid bleach, strong solvents, or abrasive cleaners that can weaken webbing fibers.
Spot test before you clean a visible area. Apply a small amount of diluted cleaner to an inconspicuous section of the belt, wait a few minutes, then blot dry and check for color change or loss of texture. If the belt’s appearance or feel changes, stop and consult the vehicle manual or a professional.
Step 1, extend the belt fully so you can work along an exposed length without pushing water into the retractor. Work on a towel or protected surface. Mix a gentle cleaning solution: one teaspoon of mild liquid detergent in about 500 milliliters of warm water, or use a manufacturer-approved upholstery cleaner diluted per its instructions. See the dilution calculator for exact ratios if you prefer.
Step 2, apply the cleaner sparingly. Lightly dampen a microfiber cloth or soft brush with the solution rather than saturating the webbing. Work along the weave in short strokes, moving from the buckle end toward the retractor to avoid pushing grime deeper into the mechanism. Keep motions gentle and consistent.
Step 3, blot and lift soils. After gentle agitation, immediately blot the area with a dry microfiber towel to soak up moisture and lifted residue. Do not rub hard. For tougher spots, repeat the sparing application and blotting until the visible stain is reduced, always taking care not to over-wet the belt.
Step 4, rinse sparingly. Lightly dampen a clean cloth with plain warm water and go over the cleaned area to remove any soap residue. Blot with a dry towel again. The goal is to remove cleaner from the surface while minimizing water near the retractor housing.
Step 5, partial air-dry before retracting. Allow the belt to air-dry in its extended position until it feels mostly dry to the touch along the cleaned sections. Do not force the belt back into the retractor while it is saturated. If the belt is still noticeably damp after initial drying, repeat blotting and let it dry longer before letting it retract.
How to test the belt afterward: once the belt is mostly dry, extend and retract several times. Confirm smooth travel, reliable locking when pulled sharply, and consistent buckle engagement. If the belt shows stiffness, stickiness, or the retractor hesitates, stop using the belt and have it inspected by a professional.
Materials and mild cleaners to use
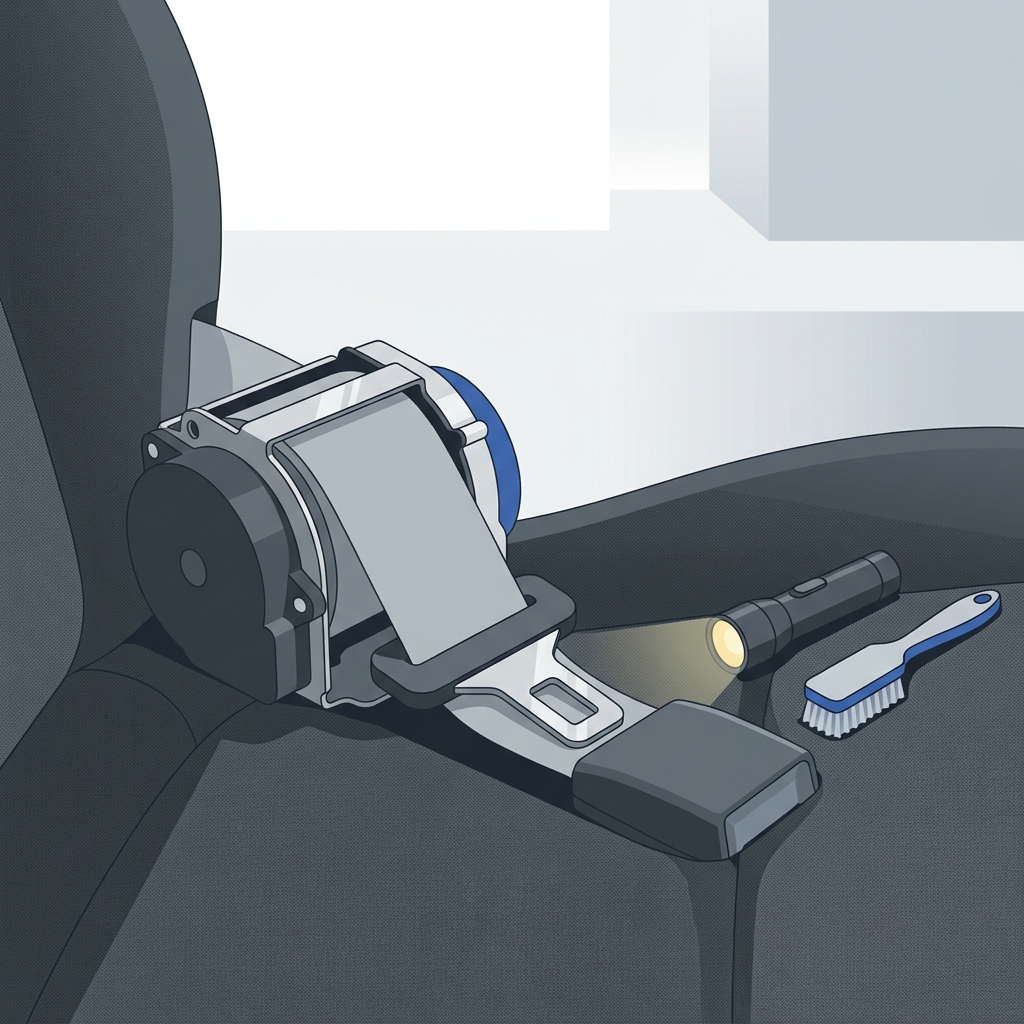
Use a mild detergent and warm water, a soft-bristled brush, and microfiber towels. Gloves protect your hands and keep oils from transferring back to the fabric. Avoid household bleach, concentrated solvents, vinegar in high concentrations, or strong degreasers, all of which can weaken fibers or affect color.
Detailed cleaning steps
Work methodically from one end to the other, keep cleaning solution light, blot rather than rub, and repeat only as needed. Small, controlled cleaning cycles reduce the risk of wetting the retractor or soaking the inner layers of the webbing where strength could be compromised.
How to test the belt afterward
Functional checks after cleaning are critical. Test retraction under normal and quick-pull conditions to ensure the locking mechanism engages. Fasten and release the buckle repeatedly to confirm secure engagement and release function. If any mechanical behavior is abnormal or the belt smells strongly after drying, seek inspection rather than continuing to use it.
Cleaning treated, synthetic or leather-trimmed seat belts and manufacturer precautions
Some seat belts have coatings, synthetic treatments or leather trims that need gentler care. Coated webbing can react poorly to solvents and strong detergents, and leather trims should be treated with leather cleaner formulated for automotive interiors rather than water-heavy methods.
Check the vehicle manual and any trim-specific guidance before you clean. Manufacturer instructions take priority because some vehicles have integrated sensors, pretensioners or finishes that can be affected by chemicals. If the manual is unclear, contact a dealer or authorized service center for advice.
When to get professional service: if the belt has a coating that peels, a leather trim that discolors, or if you suspect pretensioners or sensors may be affected, professional cleaning or dealer advice will reduce the risk of cosmetic damage or warranty issues.
Gently clean leather trim only with a suitable leather cleaner applied to a cloth, not directly to the trim, and avoid getting leather-cleaning products onto the webbing itself. If in doubt, isolate the trim area and have a professional detailer handle leather surfaces to protect finish and stitching.
Differences for coated or leather-trimmed belts
Coatings can trap dirt and resist normal detergent solutions, so use milder, non-alkaline cleaners. Leather trim is sensitive to moisture and to strong detergents; it requires specific leather-care products and conditioning when appropriate. Do not use bleach or solvent-based cleaners on coated or leather sections.
When to follow manufacturer instructions or dealer service
Always defer to OEM guidance where provided. Cleaning methods that void warranty language, or that risk damaging pretensioners, sensors or finish, should be avoided. If your vehicle has advanced restraint components or you are unsure of the belt construction, ask the dealer for recommended cleaning approaches.
Drying, reassembly and testing for safety after cleaning
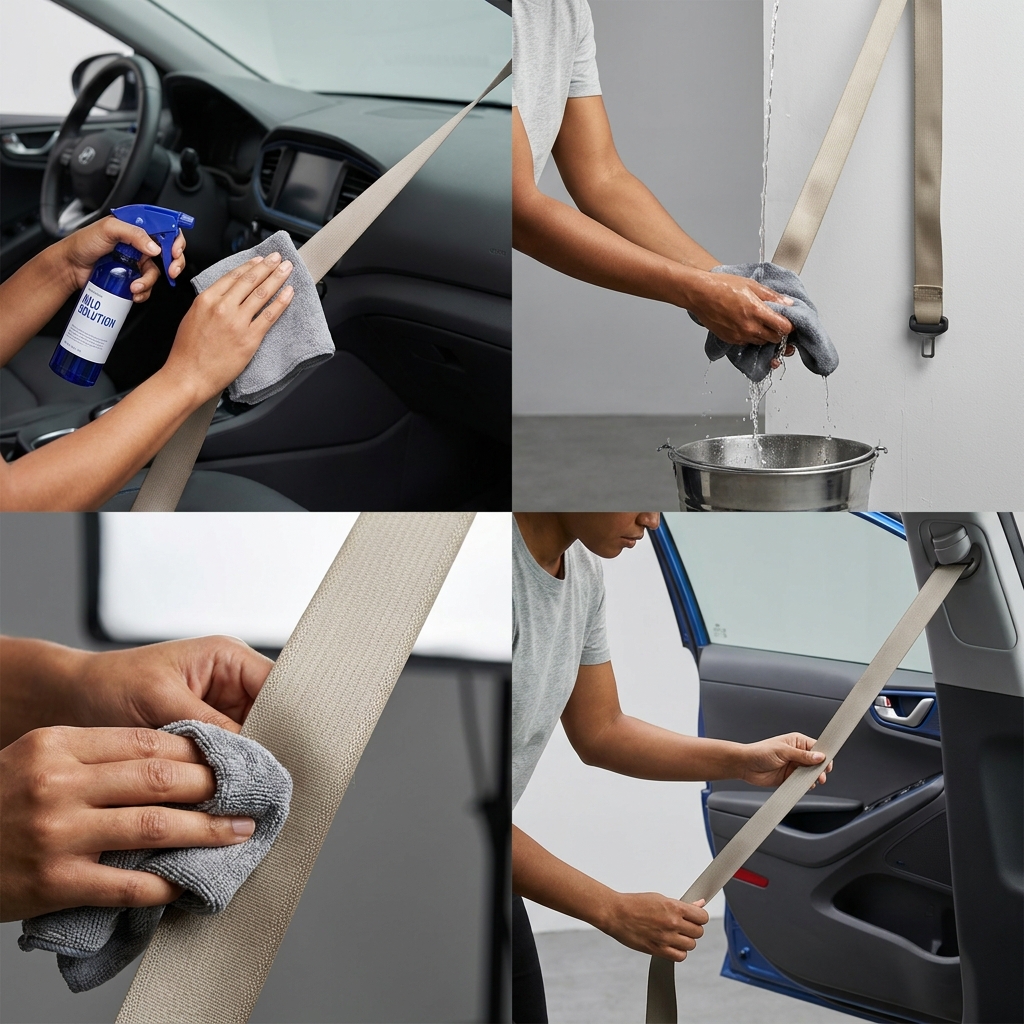
Drying is as important as cleaning. Keep the webbing extended and upright during drying in a well-ventilated area away from direct heat or sunlight. Direct heat can make fibers brittle or affect coatings. Allow the webbing to dry mostly before retracting to prevent moisture from getting trapped inside the retractor housing.
Best method: air-dry with the belt extended, supported so it does not crease. Use a fan for airflow if needed. If the vehicle must be used before the belt is fully dry, do not rely on the cleaned belt as the only restraint until you confirm full function; use alternative seating positions if practical.
Final functional checks are straightforward: extend and retract fully several times, listen and look for smooth motion, test rapid-lock by pulling sharply, and buckle and unbuckle repeatedly. Also perform a tactile check for stiffness or any sticky residue. If you notice odd retractor behavior or persistent odors, stop using the belt and seek inspection.
Safe drying methods
Avoid forced heat sources such as hair dryers set to hot, engine heat, or direct sunlight that can degrade materials. If you need faster drying, use low-speed fans and keep the interior ventilated. Never force the belt into the retractor until it is largely dry to the touch along the cleaned area.
Final functional checks
Confirm smooth travel and secure buckle engagement. Test the locking mechanism by a quick pull and allow it to retract. If the belt binds, drags, or the buckle feels gritty, discontinue use and seek a qualified inspection before driving with that seat belt.
Common mistakes, troubleshooting and long-term odor prevention
There are predictable mistakes to avoid: saturating the retractor area, using bleach or strong solvents, aggressive mechanical abrasion, and ignoring visible fraying or damage. These missteps can reduce belt strength or impair safety components.
When cleaning does not remove odor, broaden the inspection. Check adjacent upholstery, under-seat areas and carpet for trapped spills or mold. Odors may come from padding or under-seat trays rather than the webbing itself. Repeat gentle cleaning cycles on the webbing only if the belt remains in good condition.
Troubleshooting quick fixes: for light lingering odors, keep the car ventilated and use a fabric-safe interior deodorizer placed away from the belt. If smells persist after repeat gentle cleaning and drying, consider professional deodorizing services that can treat upholstery and under-seat compartments without risking belt mechanisms.
What not to do
Do not saturate the belt or its housing, do not use household bleach or solvent cleaners on the webbing, do not sand or aggressively abrade stains, and do not ignore fraying. Any of these actions can weaken the webbing or damage stitching and hardware.
Quick fixes and when to replace the belt
Quick fixes like ventilation and spot cleaning can help short-term, but replace the belt if there is visible fraying, broken fibers, or if the retractor fails mechanical tests. A replacement is necessary when strength or function is compromised.
Preventive care habits
Prevent odors by wiping up spills quickly, avoiding eating in the car when possible, rotating usage so the same belt is not always used, and maintaining interior ventilation. Routine interior cleaning and protecting seats from moisture will reduce the chance of odors reappearing on the webbing.
Frequently asked questions
Can I use household cleaners on seat belts?
Avoid bleach, strong solvents and abrasive cleaners. Use a mild detergent or approved upholstery cleaner and test a small area first.
Will cleaning the belt damage the retractor?
Not if you avoid getting water into the retractor housing and let the webbing dry mostly before retracting. If the retractor behaves oddly, stop and seek inspection.
When should I replace a seat belt instead of cleaning it?
Replace the belt if it is frayed, has broken fibers, damaged stitching, or if mechanical tests show the retractor or buckle is unreliable.
Cleaning seat belt webbing can be straightforward when you work carefully, use mild cleaners, and prioritize drying and function checks. If you encounter fraying, mechanical issues, or uncertainty about a pretensioner or trim, pause and get professional inspection. Following gentle cleaning steps and simple preventive habits will keep your belts smelling better and working reliably for the long term.
References
- https://drivenandkept.com/interior-care/clean-fabric-car-seats
- https://drivenandkept.com/tools/dilution-calculator
- https://drivenandkept.com/surface-atlas/leather-and-synthetic
- https://www.serramazdaakron.com/blog/how-to-clean-your-cars-seat-belts-updated
- https://www.autozone.com/diy/interior/how-to-clean-car-seat-belts
- https://www.simoniz.uk/blog/how-to-properly-clean-disinfect-seatbelts/